
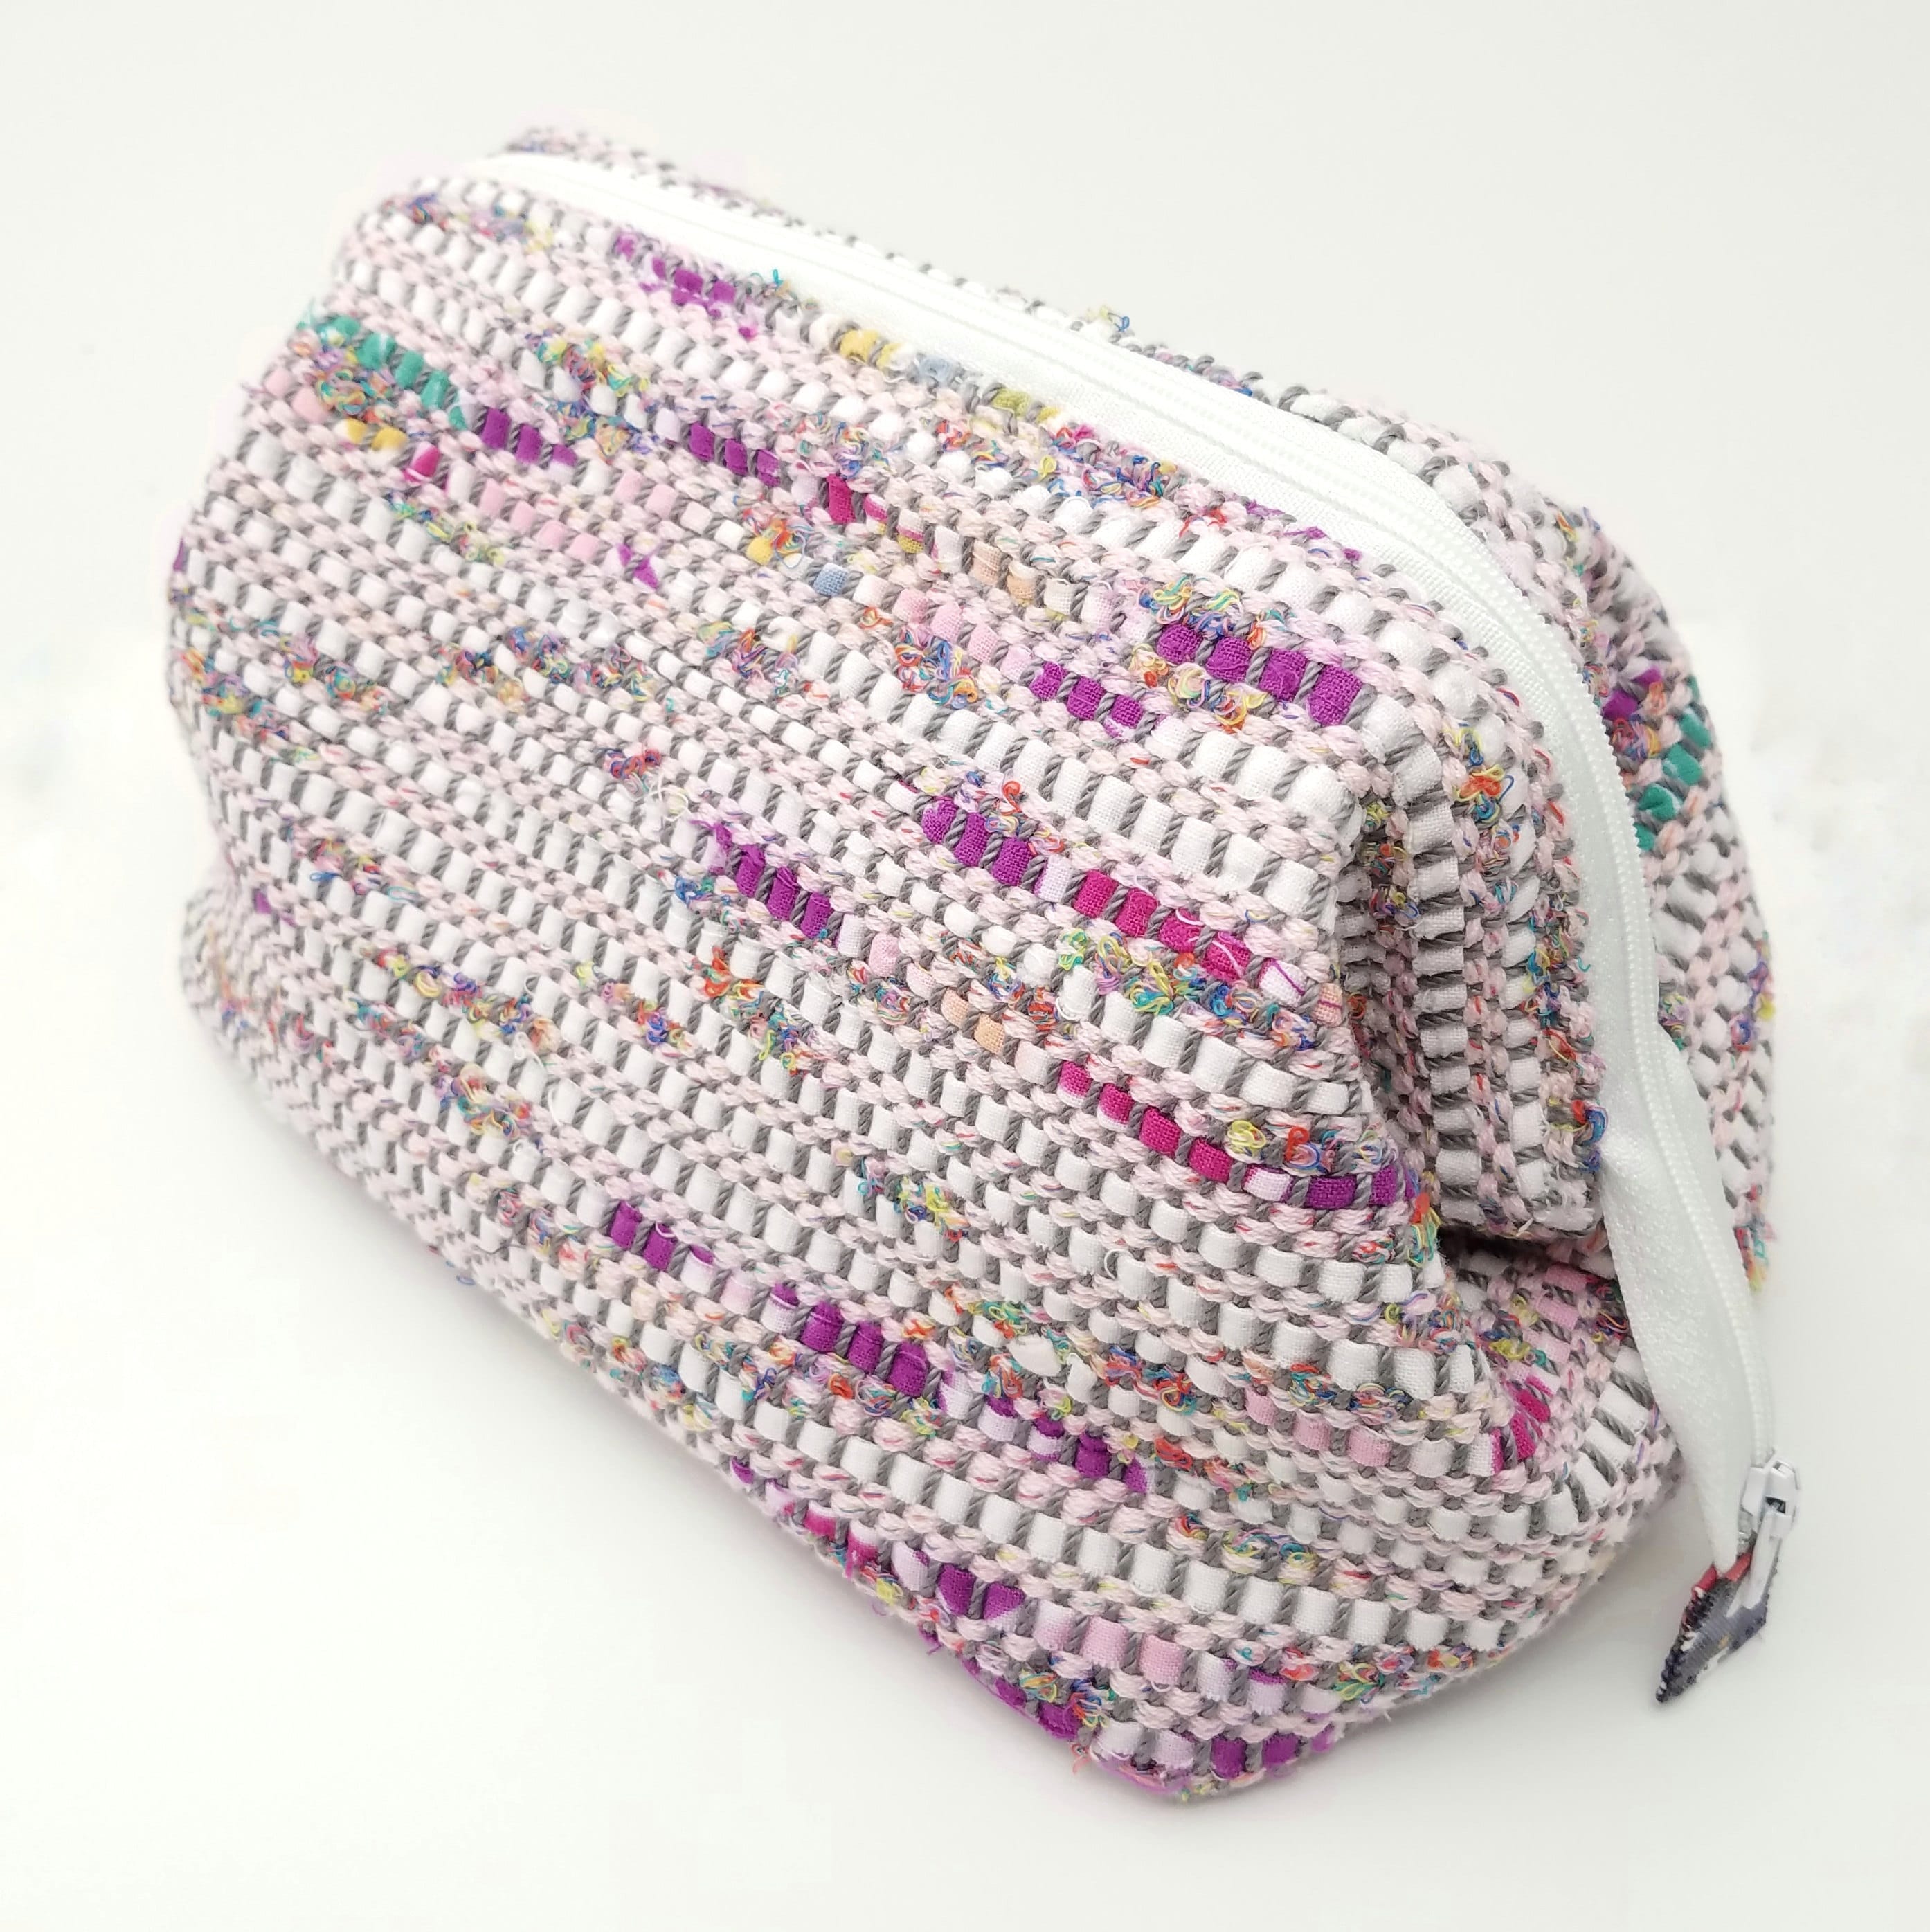
I have recently started to carry the Clover brand Sakiori loom in my shop. I decided to carry this loom because it is so compact, easy to use and innovative. This post gives a brief overview of the materials and process used to create a wire framed cosmetic case from sakiori fabric created on the Clover sakiori loom.
Traditional sakiori (scrap weaving) often uses strips of yukata or kimono fabric. The strips were often alternated with 2 picks (rows) of yarn because there wasn't enough scrap fabric to complete the project. 2 picks of yarn were used to 1 pick of scrap fabric to allow the warp to alternate over and under the scrap strips.
The particular yukata fabric that I used for this project features pink flowers over a white background. Unfortunately the white portion of the fabric was heavily stained and after soaking it the color bled quite heavily. This made the fabric perfect for sakiori. I used two sections of this yukata fabric to make 8 mm strips using my Saori strip cutter.
I warped my 40cm Clover sakiori loom using Aunt Lydia's Fashion 3 size 1 (super fine) cotton yarn in a gray hue. I used the entire 150 yards to warp 100 cm in length.
*I actually recorded this entire process and hope to have it available for viewing soon*
The weaving went quickly and I was finished in a few hours. The weft was 2 picks (rows) of salvaged Saki brand Japanese yarn (75% cotton 25% acrylic 1 3/4 oz 50g) and 1 pick of 8 mm wide yukata strips.
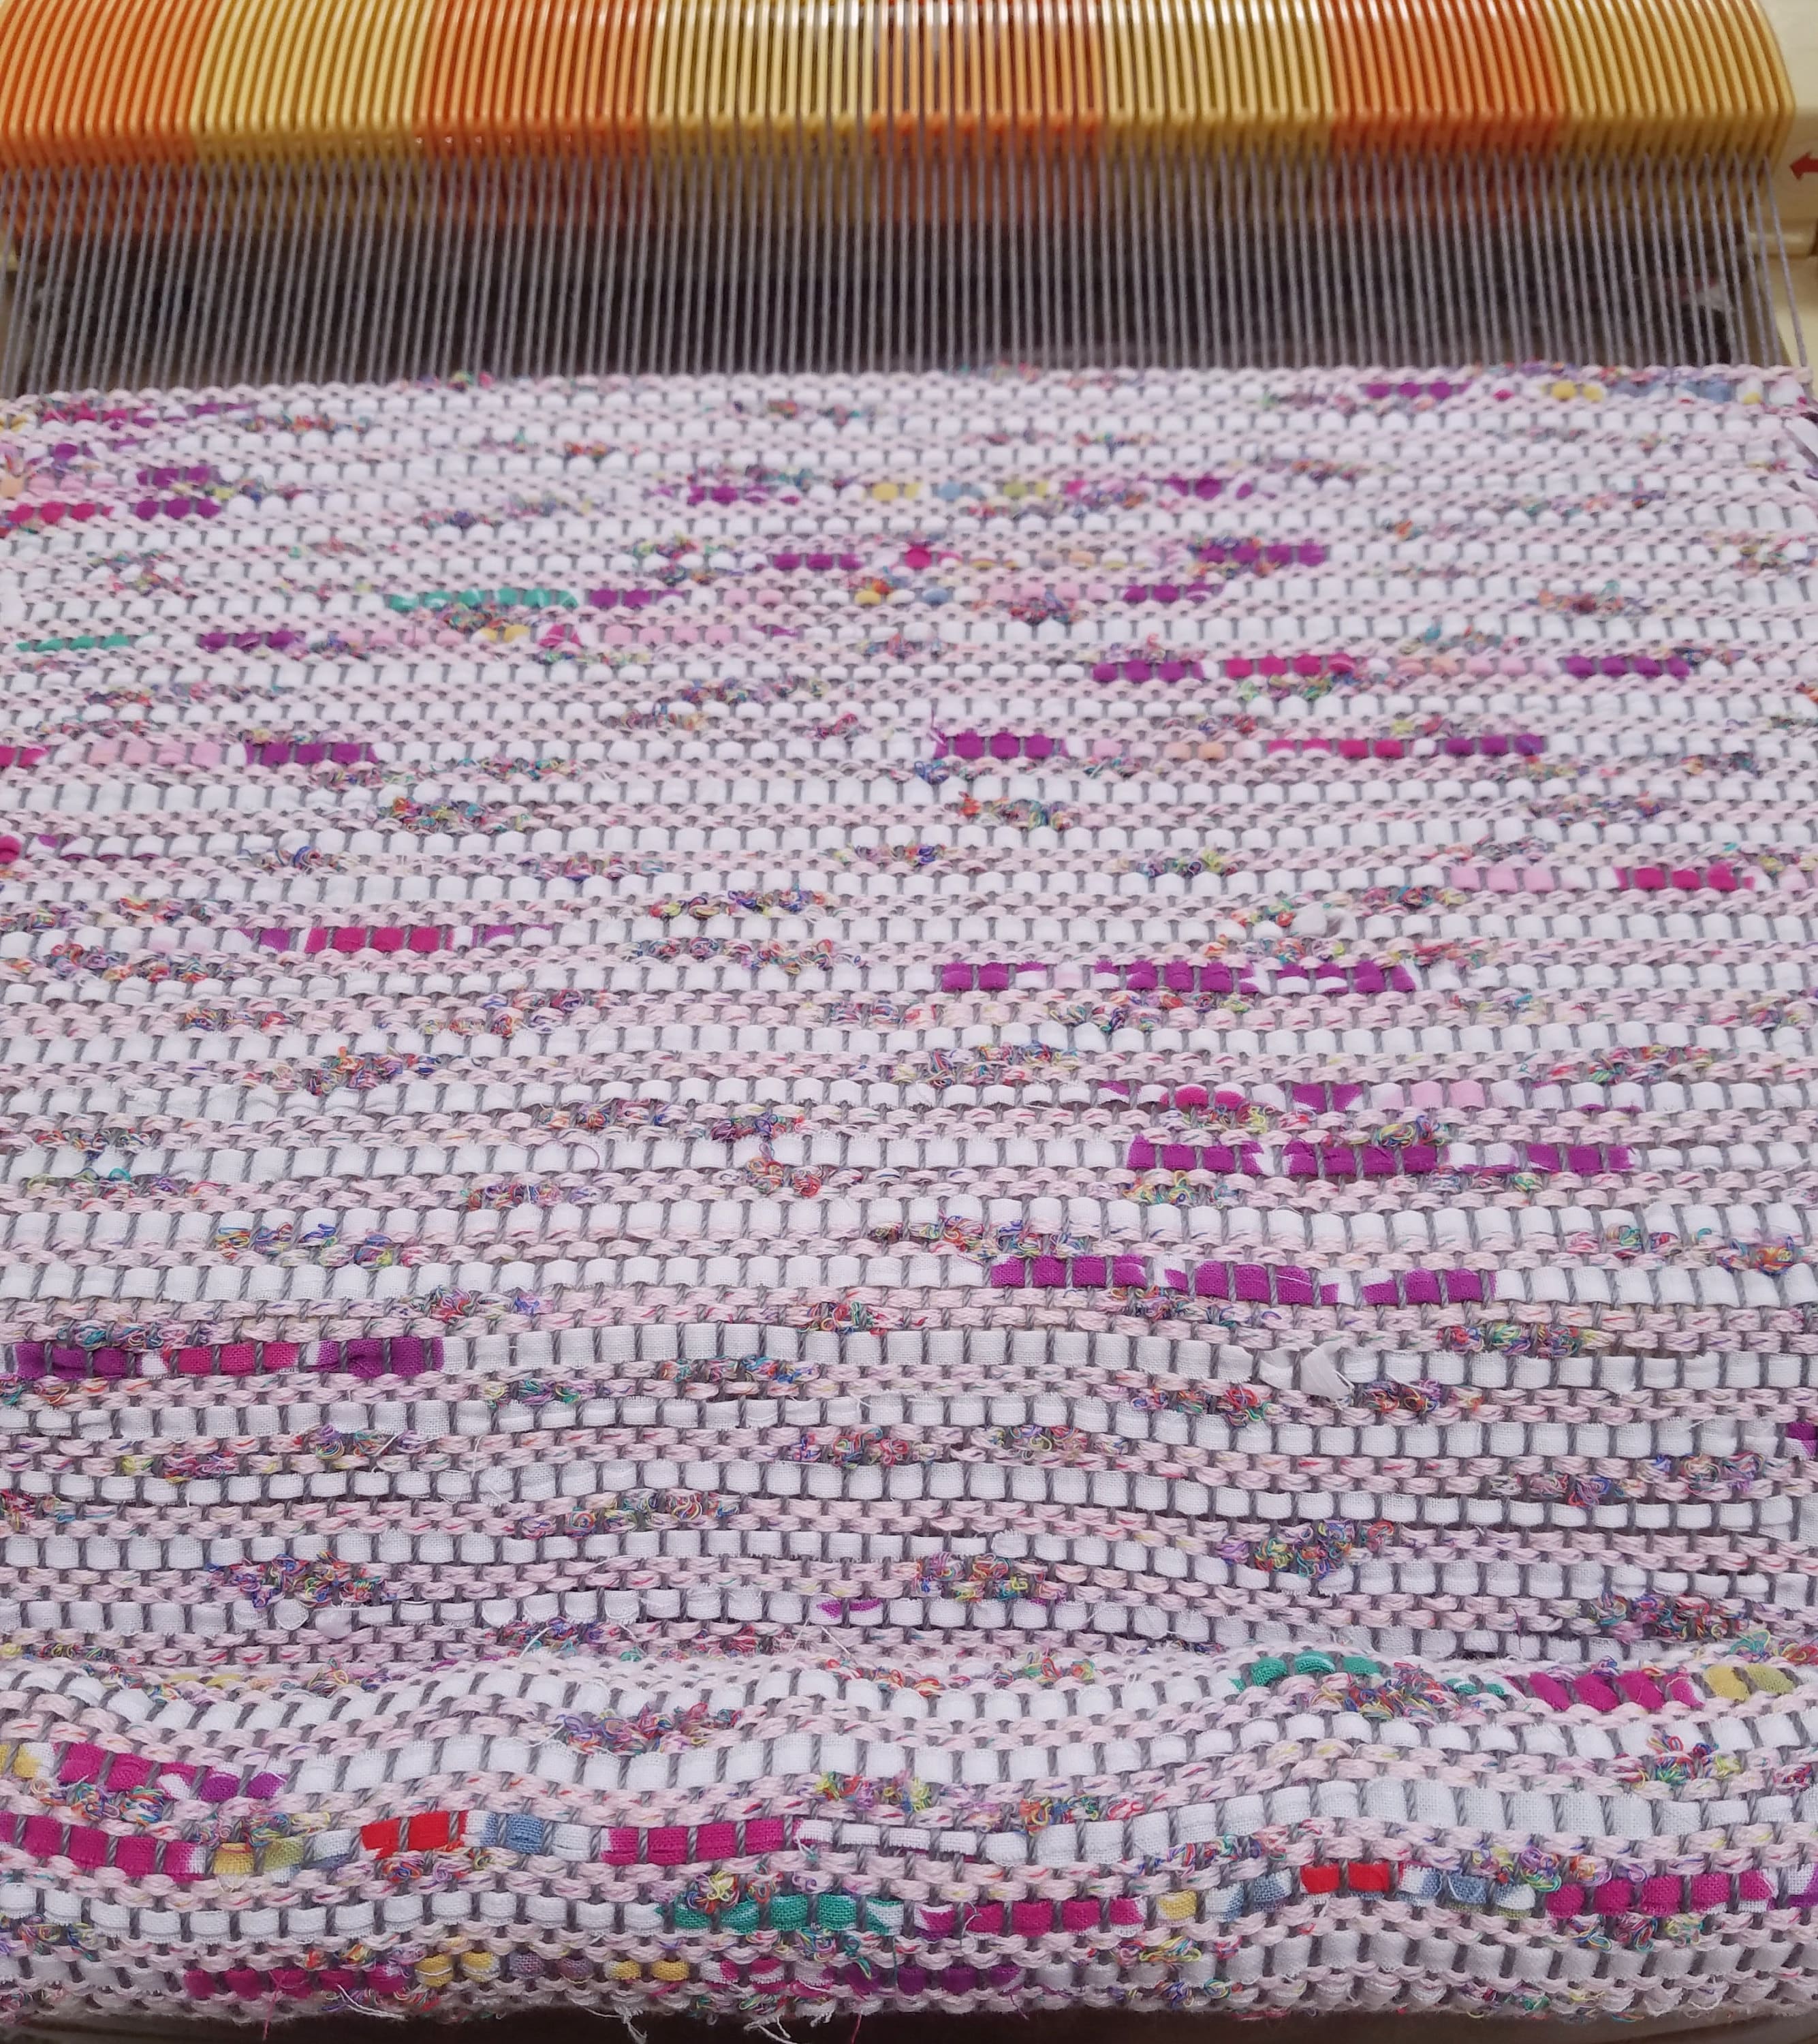
I had 150 yards of the Japanese yarn and I did not use the entire amount. About 30 yards of the 8 mm wide yukata cotton was used.
Once completed the fabric was removed from the loom and washed in cool water. It was placed on a towel and rolled up to remove excess water and then allowed to dry fully. When it was dry I ironed it on the appropriate iron setting with steam.
The case was created using Zakka Workshop's metal framed cosmetic case kit. This kit came with a pattern and hardware used for this project. My entire woven piece of fabric was too long for the pattern so I did cut the length of the fabric but not the width. Prior to cutting the woven fabric I sewed two lines on each side of the cutting line so that the fabric would not unravel after I cut it. The pattern called for box pleats on the bottom of the bag. I created these without cutting the excess fabric from the pleated areas and then simply tacked the excess fabric corners down to keep them from bunching.
The remainder of the project was completed as per instructions.

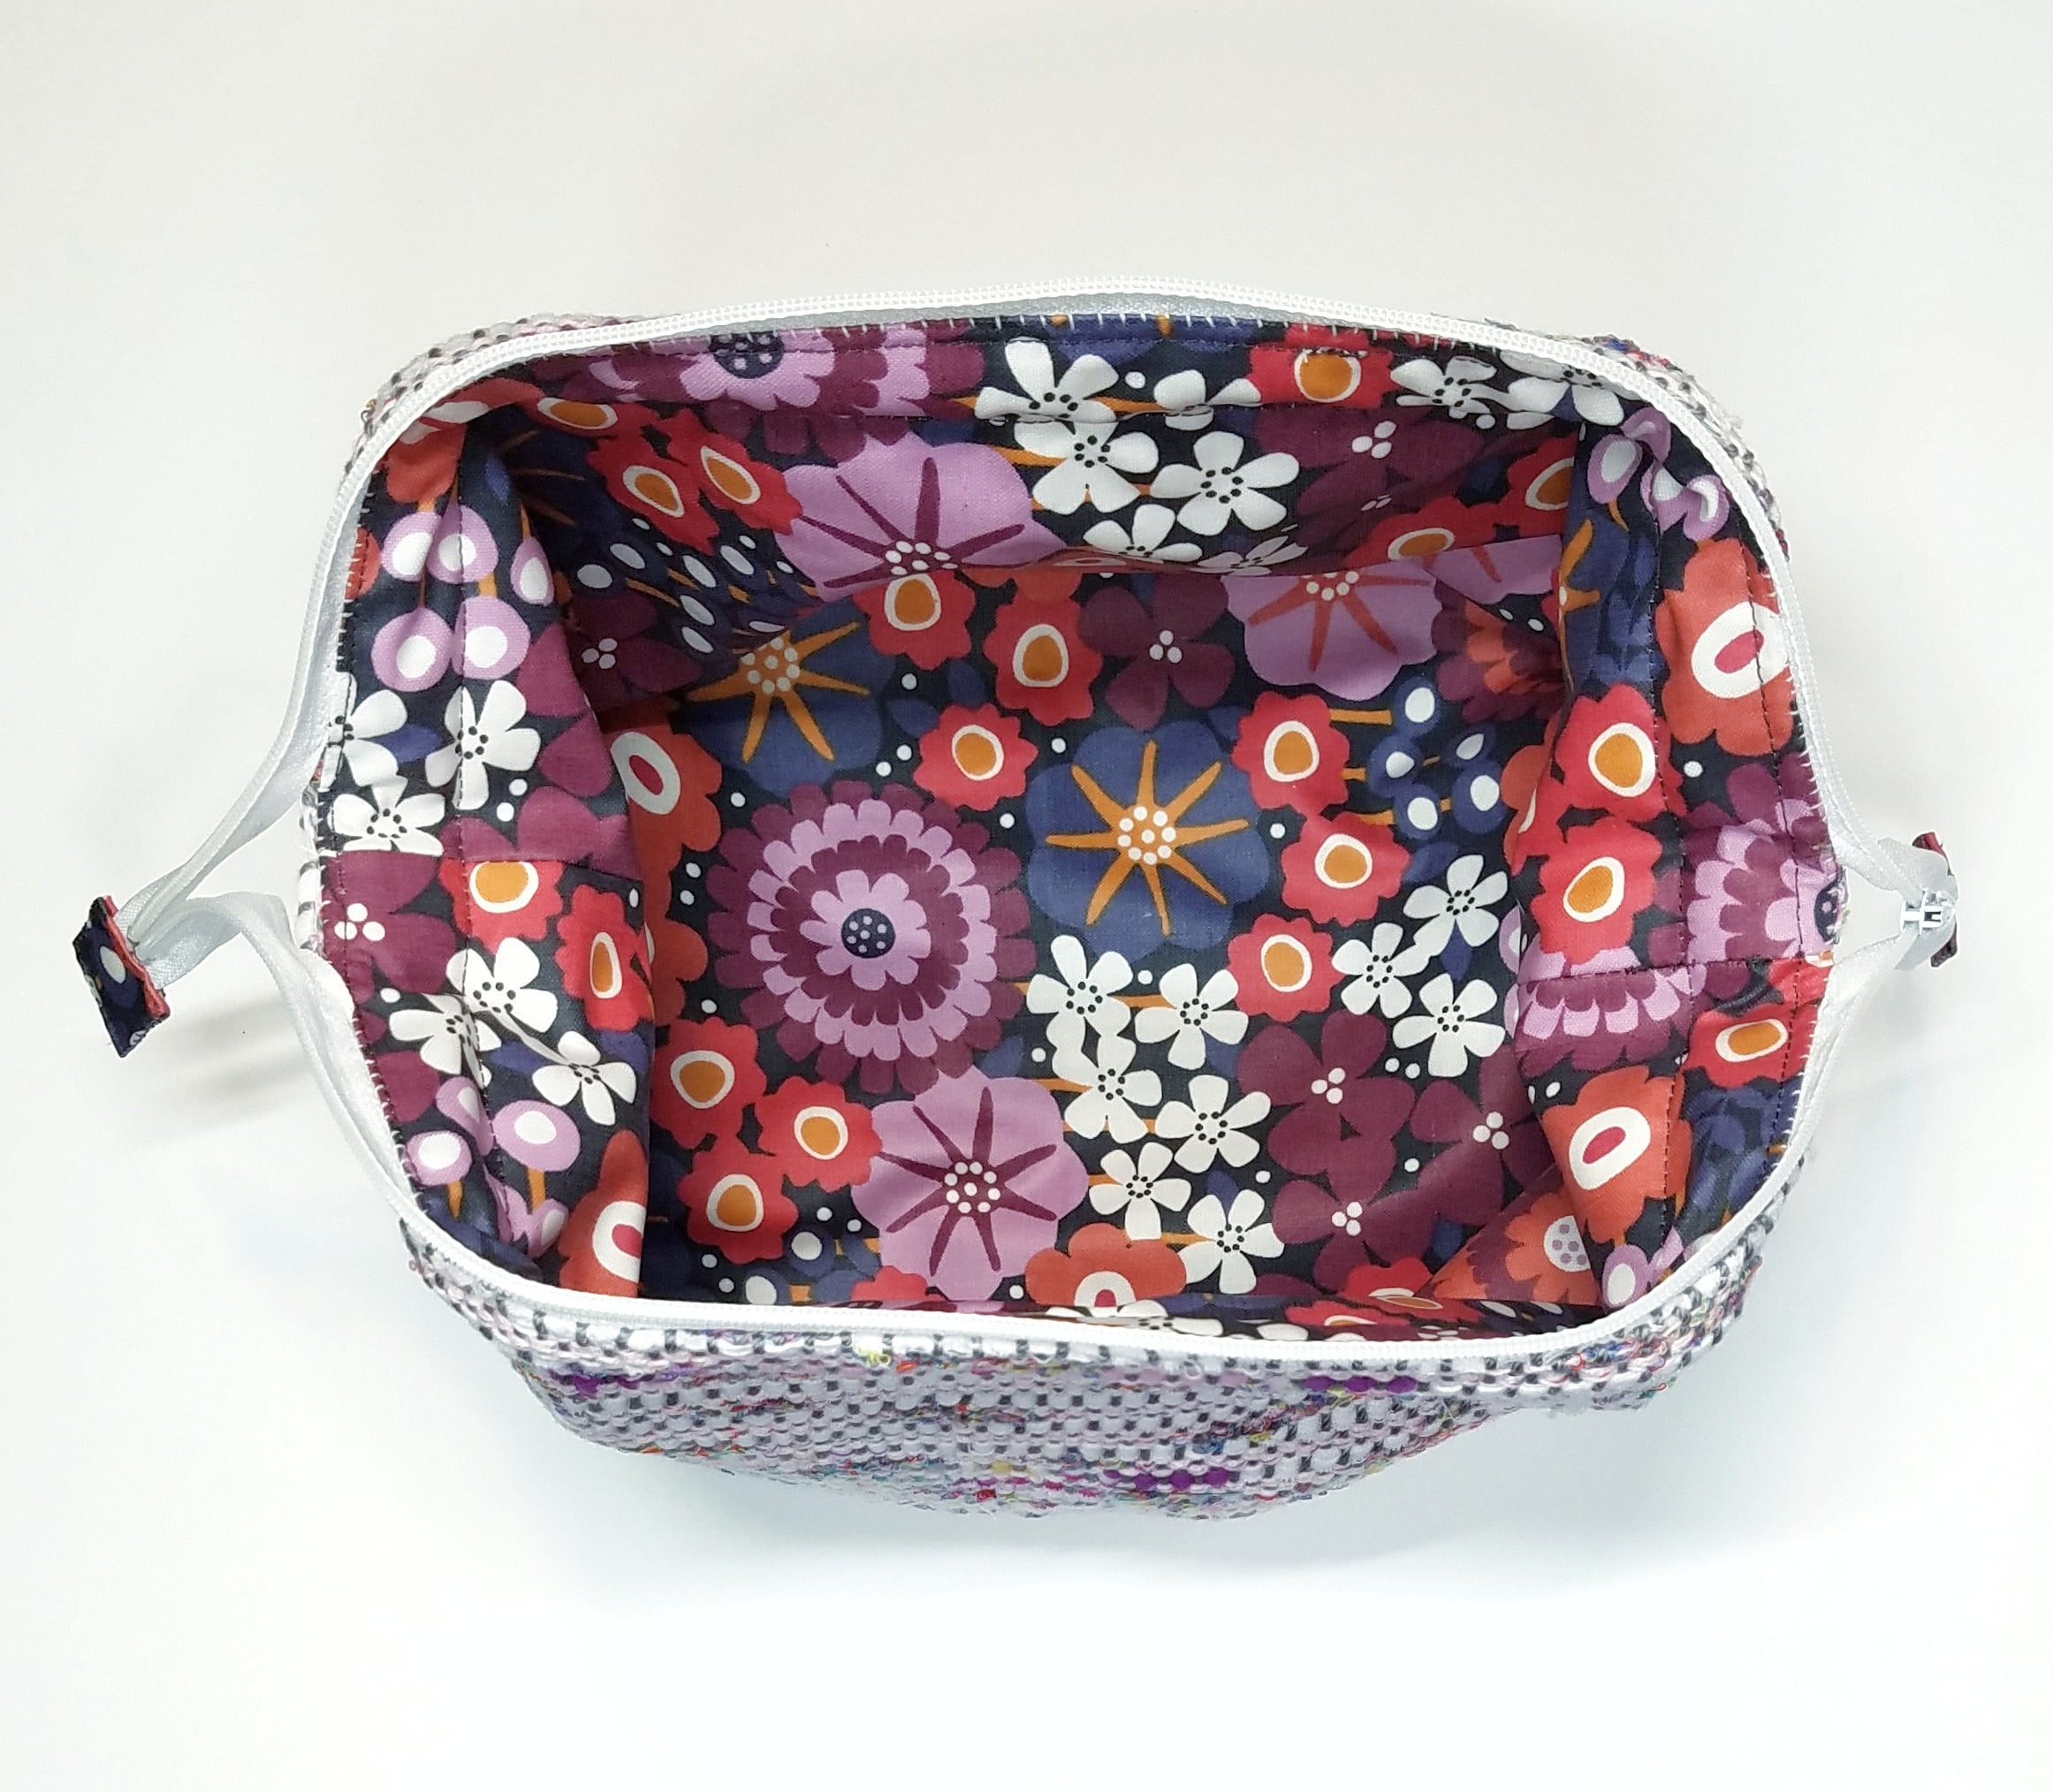
I used Splash fabric's eco-friendly, laminated cotton for the interior lining of the bag. This laminated cotton is easy to sew and can be ironed! The bag has a super sturdy and wide opening due to the metal frame that is inserted between the lining and exterior fabrics.
The bag making process was simple and the final results are beautiful. The texture of the woven fabric is also wonderful. I hope that this provides inspiration and ideas for anyone that is learning about creating sakiori fabrics. It can be scary to cut your newly woven cloth but the results can be stunning and it is wonderful way to incorporate your favorite fabrics into your day to day life.